Imagine you've just designed your dream bathroom. You've carefully chosen new fixtures, opted for luxurious rainfall shower heads, and made the decision to replace your old bathtub. However, once the exciting parts are done, the real work begins.
If you have ever taken on a renovation project yourself, you understand the various mishaps that can occur. Upgrading your bathtub, in particular, can be daunting, even for experienced plumbers.
With so many tub models, finishes, and drain configurations, choosing the proper installation techniques can be overwhelming. In this blog post, we’ll share some expert tips for installing a bathtub like a pro and avoid costly mistakes that can set your project back weeks.
1. Check the plumbing rough-in and measure
Before installing a new bathtub, ensure the area is properly roughed-in, with the right studs and dimensions. This means checking the area’s width, length, and depth to ensure the tub fits perfectly. Get a rough-in submittal from the manufacturer to ensure everything is laid out correctly.
Make sure you have the correct dimensions and tub size before framing the walls. Improper framing can lead to difficulties in fitting the tub or require additional adjustments later on.
You will also need to make sure that the area is level and has proper drainage. An improperly leveled tub will cause water to pool.
2. Turn off the water
Before installing the tub, ensure that the main water supply to the bathtub has been turned off. Failure to do this can result in water damage and costly repairs. Typically, the water shut-off valve is located near the tub’s plumbing.
BONUS TIP: This is also a great time to check for leaks where the tub will be installed. Common indicators of leaks are warped walls, musty smells, and damaged ceilings or floors. Repair any leaks before proceeding with installation to avoid further damage and complications.

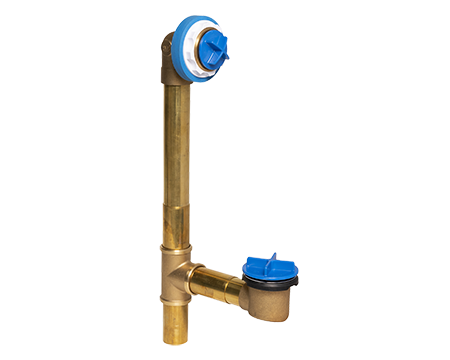
3. Carefully consider bath waste and overflow system options
Prepare your bathtub by assembling and attaching the drain and overflow to their designated locations on the tub. Make sure all connections are secure to prevent future leaks. Depending on the tub’s design, you may have to cut and position the pipes correctly. Cut the pipes to the desired length and make sure the connections are tight and secure.
To simplify installation and easily accommodate jobsite obstructions, we recommend using a Dearborn® True Blue® FLEX full bath waste kit. This product offers flexible and adjustable tubing as an alternative to rigid PVC, providing ultimate maneuverability. Because of this, it is easier to overcome job site obstructions, such as floor joists, misaligned or offset drains, and severely sloped walls. In addition, because of the flexible tubing, you won’t need additional fittings to fit your space, making it perfect for first-time renovators.
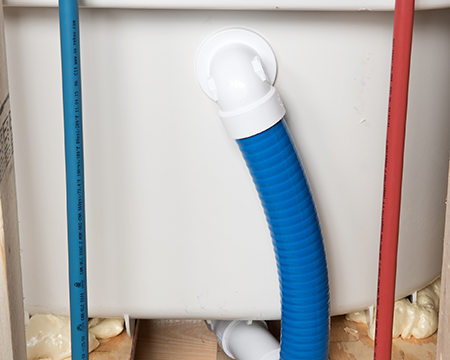
The True Blue FLEX also allows a tool-free installation process that eliminates stress in compact areas. True Blue FLEX comes with a screwless overflow faceplate, innovative overflow gasket, press-in trim veneer, locking drain gasket, and a quarter-turn test plug. Available in both full and half kits, its flexibility allows installers to advance their bathroom with efficiency. Created to provide solutions for every décor, the True Blue FLEX is available in seven designer finishes: Chrome, White, Matte Black, Oil-Rubbed Bronze, Brushed Gold, Champagne Bronze and Brushed Nickel.
For homeowners planning a complete remodel, a Dearborn True Blue Bath Waste Full kit is a good option because it includes all the necessary components and trim, along with piping. This eliminates the need to buy, measure, or cut piping separately. Depending on the material, some full kits may require solvent welding of pipes to fittings, while others use a slip joint.
4. Level the subfloor
Use a level to ensure the fixture is perfectly balanced when setting your tub before securing it in place. This leveling is essential for proper drainage. As noted, an incorrectly sloping tub can cause water to pool. In addition, proper leveling maintains the stability of your bathtub. If your subfloor is not level, use shims or cement-based products to achieve a level surface.
5. Defer to the manufacturer's guide and set the tub
Once you have installed your bathwaste and overflow system, it is time to set the tub. Following the manufacturer’s recommendations is crucial to ensure your tub is installed correctly since every tub is different.
Depending on the type of tub, you may need concrete underneath to act as a base. Some tubs use a stringer — an extra 2x4 fastened into the studs the tub will sit on — for additional support. Use a level to ensure your tub is perfectly balanced before securing it. Again, this is important for proper drainage and fixture stability. Use shims if necessary to achieve a level surface.
The type of support system will vary depending on the manufacturer, so opt for the one most compatible with your tub. Improper support can cause flexing and movement, leading to leaks and damage.
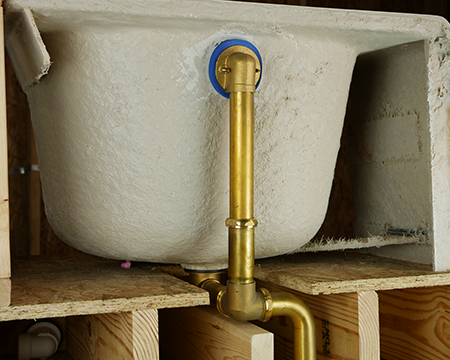
6. Test piping
Once your tub is installed, you must pipe in your water valve and supply piping. From there, connect the bathwaste and overflow system to the sanitary system by connecting the piping to the P-trap. This process will vary depending on whether the pipes are in the floor joists or in the wall.
Once the tub is connected to the plumbing system, test that the connections are watertight. Do this by putting pressurized water through the system and checking the connection points.
Spout won't get put on until the surrounding walls are finished.
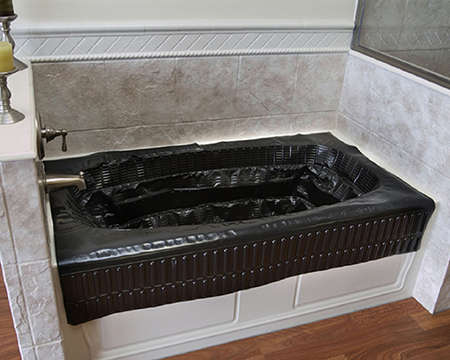
7. Protect the tub
Accidents are bound to happen during the renovation process. Protect your new tub from scratches, staining, and dents using a tub protector.
Plastic or cardboard covers can also protect fixtures, such as sinks and urinals, from debris and damage during construction.
8. Choose the correct wallboard
Now that your tub is set and piped, you can install the wallboard. If you plan to use tile instead of an acrylic surround, you will need to use an approved wallboard for shower applications to protect the underlying structure from water damage.
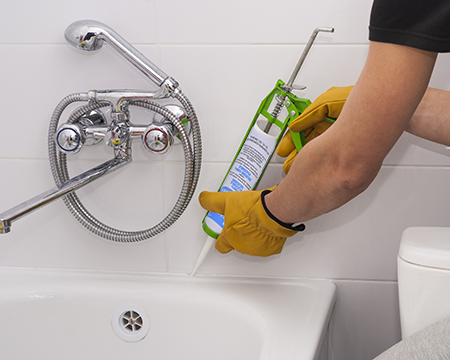
9. Seal the tub
To protect your tile or acrylic surround bathtub from water damage, use silicone sealant or caulk to seal areas where water can seep in. Failing to do so can cause water damage and mold growth. Water seeping behind the tub can cause structural damage to the wood framing.
Installing a bathtub need not be a challenging process. A successful installation can add value to your home and transform your bathroom space into a relaxing haven. Follow these tips and tricks, and your next bathroom renovation will be a breeze.